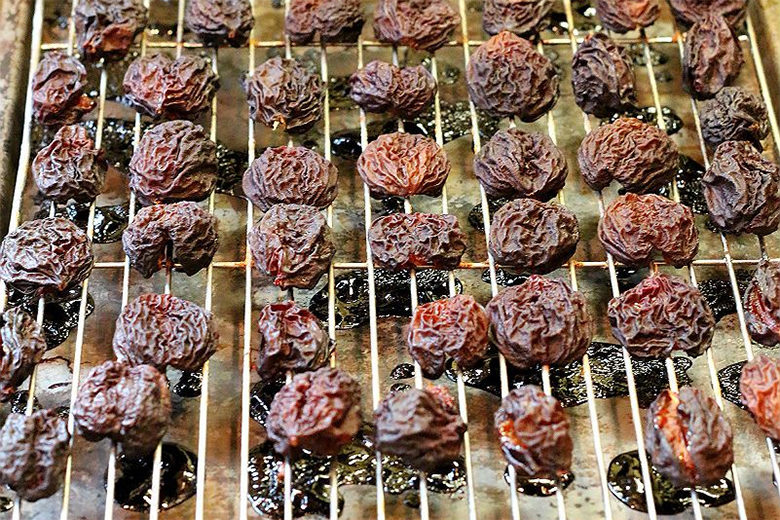
Apparently forgetting I was about to leave on a three-week vacation, I recently bought a five-pound box of plums. Or maybe I thought my family and I could eat five pounds of plums in a week. Turns out that we cannot.
Needless to say, we were about to leave and I was left with about four pounds of uneaten plums. Always hating to waste food, I figured I had better do something with them. I thought drying the plums into prunes would be pretty easy… and I was right!
Step 1: Remove the Pits
I find prunes with pits to be indescribably annoying and inconvenient, so I decided to remove them. After a little trial and error, I found my method: I cut a slit lengthwise down the plum, being careful not to cut it totally in half; then I stuck my fingers in and pulled out the pit. It took about 15 minutes to get through four pounds. If you’re drying other fruits, you might try preparing them in the following ways:
- Plums: pits removed, whole
- Cherries: pits removed, whole
- Blueberries or cranberries: whole
- Apples or pears: cores removed and cut in thin slices or rings
- Bananas: thinly sliced
- Strawberries: hulled and sliced or quartered
- Mangos, papayas or pineapple: pits or cores removed and thinly sliced
Step 2: Into the Oven
I don’t have a food dehydrator. Even though there are plenty of models for sale, I am not ready to make an investment in another kitchen appliance that takes up space. Instead, I used my oven for drying. This method takes a long time, which means your oven will be occupied for hours on end, so make sure you don’t need to use it for anything else that day.
I dried the plums on a rack over a baking sheet to help air circulate and reduce the amount of juice that would burn. If you’re drying smaller fruits, such as cherries or blueberries, a rack may not work since they will fall through. Instead, try lining a baking sheet with a silicone mat or parchment paper to prevent sticking.
Drying should be done at a low temperature — about 200°F. I used my oven’s convection mode in hopes the job would be made faster (since I didn’t try it on the regular baking mode, I’m not sure if it was faster or not).
Since all ovens are different, and the rate of drying depends on the size and juiciness of the fruit, as well as the humidity in the air, keep a close eye on your fruit. I checked mine every hour (see the progression in the photos). This means you need to be home and available the whole time. Remove the fruit when it is dried to your preference.
Step 3: Storing
After removing the dried fruit, let it cool and place in an airtight container. One thing to remember with homemade dried fruit is that it is preservative-free, which means it will not last as long as store-bought dried fruit. In fact, if you leave it at room temperature for extended periods of time, it likely will develop mold. If you know you won’t eat the dried fruit within a week, store it in the freezer and thaw at room temperature when ready to eat.


