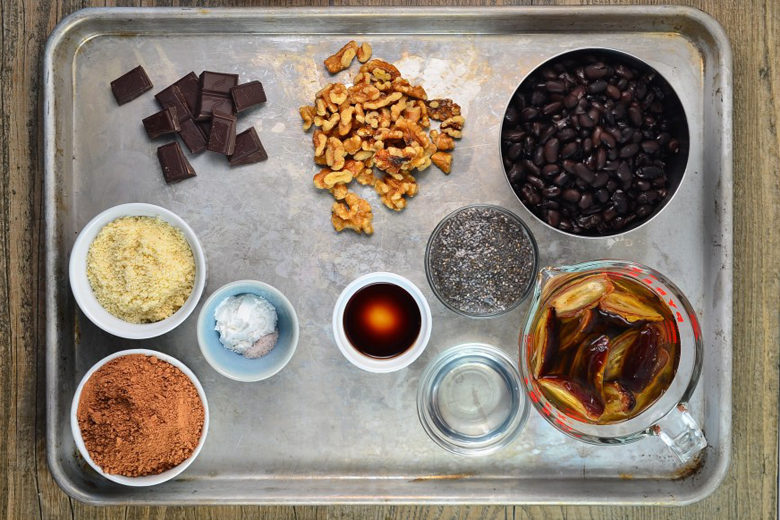
A gluten-free, grain-free, vegan brownie? You might wonder — why bother?! The Minimalist Baker convinced me otherwise. Here, I have adapted her black bean brownie recipe to make it sugar-free as well.
Beans, being a magical fruit in more ways than one, make a healthy brownie possible. Beans replace flour with pure vanilla and raw cacao, camouflaging the bean flavor. Date paste replaces sugar. The result is a firm outside encasing a moist, dense and rich chocolate pudding-like texture inside. Only slightly sweet, this is an adult-style brownie. Think flourless chocolate cake, but healthier and antioxidant rich.
Part of the fun of these brownies is customizing the tops. Simply adorned with chopped walnuts, these are a perfect morning grab and go. Breakfast brownies! Small but filling, with 6 grams of fiber, one brownie staves off hunger for hours. Or, dress up the tops with chopped dark chocolate and suddenly it’s dessert time. Or perhaps sea salt? These are small but dense treats. If you prefer them on the more voluminous side, you can add a half a cup of almond flour. But I prefer the texture without the almond flour.
Rather fond of these, I ‘have my brownie and eat it, too,’ and am making them regularly, even now — these are worth turning the oven on in the New York City heat. Need I say more? They are quick to whip up if you keep date paste and chia gel — excellent staples for whole-foods baking and cooking — on hand. Both can be made up to a week in advance.
Vegan Black Bean Brownies
Recipe developed by Maribeth Evezich, MS, RD, CDN and adapted from The Minimalist Baker
Yields 12 brownies
Ingredients
1 ¾ cups cooked black beans (or 1 15-ounce can), rinsed and drained
1 heaping cup date paste (14 Medjool dates)
½ cup chia gel or flax eggs (combine 2 tablespoons chia or flax seeds (ground if possible) with 6 tablespoons water and let stand for 15 minutes, stirring to separate as needed)
2 teaspoons pure vanilla extract
4 tablespoons coconut oil, melted
1 cup raw cacao powder
2 teaspoons baking powder
½ teaspoon sea salt
Optional: ½ cup almond flour
Optional toppings: chopped walnuts, pecans or dark chocolate
Date Paste Directions
- Remove the stems and seeds from the dates and place in a bowl. Cover the dates with enough water to just about cover the dates and let soak for about an hour.
- After an hour, drain the dates and reserve the soaking liquid. Place the dates in a blender, preferably a smaller blender jar for this amount. Process the dates, adding the soaking liquid, 1 tablespoon at a time until the mixture is smooth, but still thick. This will require ¼ to ½ cup of soaking liquid depending on the freshness of the dates and the length of time they soaked.
Brownie Directions
- Preheat oven to 350 degrees.
- Lightly grease a 12-slot standard (not miniature) muffin pan.
- Prepare the chia gel by combining the chia seeds and water. Stir to combine, then stir intermittently until it becomes a gel, about 15 minutes.
- Combine the beans, date paste, chia gel, coconut oil and vanilla extract in a blender or food processor and process until smooth.
- Add the cacao, baking powder and sea salt to the bean mixture and process again until smooth, scraping down the sides as needed. It should eventually look like brownie batter. If needed, add a teaspoon of water at a time and blend further.
- Fill each muffin slot with about ¼ cup of batter. If needed, even out the top with a spatula. These brownies will not puff up and even out like most baked goods.
- Sprinkle with toppings of choice, pushing the pieces slightly into the top of the brownie.
- Bake for 30-35 minutes or until the top is firm and the edges have pulled away slightly from the sides.
- Remove from the oven and let cool for 30 minutes in the pan. This will result in a soft and gooey center. If you prefer a firmer texture, turn the oven off and let the baked muffins sit in the oven to cool.
- When the brownies are completely cool, gently remove them from the muffin tin.
- Stored in an airtight container, these will keep for several days and up to a week, if refrigerated. These also freeze well.


